 Article
3 Popular WordPress page builders (and how they compare)
Building a new website is no small feat, and if you have little technical knowledge, it can feel next to impossible. Although some platforms such as WordPress make the process easier, it can still be challenging to create a site that’s both functional and stylish.
Page builders simplify website creation, by providing pre-built elements that you can use to construct layouts. These tools can save you time and energy while enabling you to customize each part of your site to meet your unique needs.
In this article, we’ll explore three of the most popular page builder tools for WordPress users. Let’s get to it!
1. Elementor
First up, Elementor is a drag-and-drop page builder that uses pre-built ‘widgets.’ These include basic elements like text and images, as well as more complex options such as image carousels and Google Maps. Elementor also offers page templates to get you started quickly.
Often, the only way to modify headers, footers, and other key sections of your site with a page builder is by installing that tool’s dedicated theme. With the premium version of Elementor, however, you’ll be able to customize nearly every part of your site.
Elementor’s primary disadvantage is its lack of a ‘white label’ option. In other words, there’s no way for professional developers and designers to hide the Elementor brand from clients when they log into their sites.
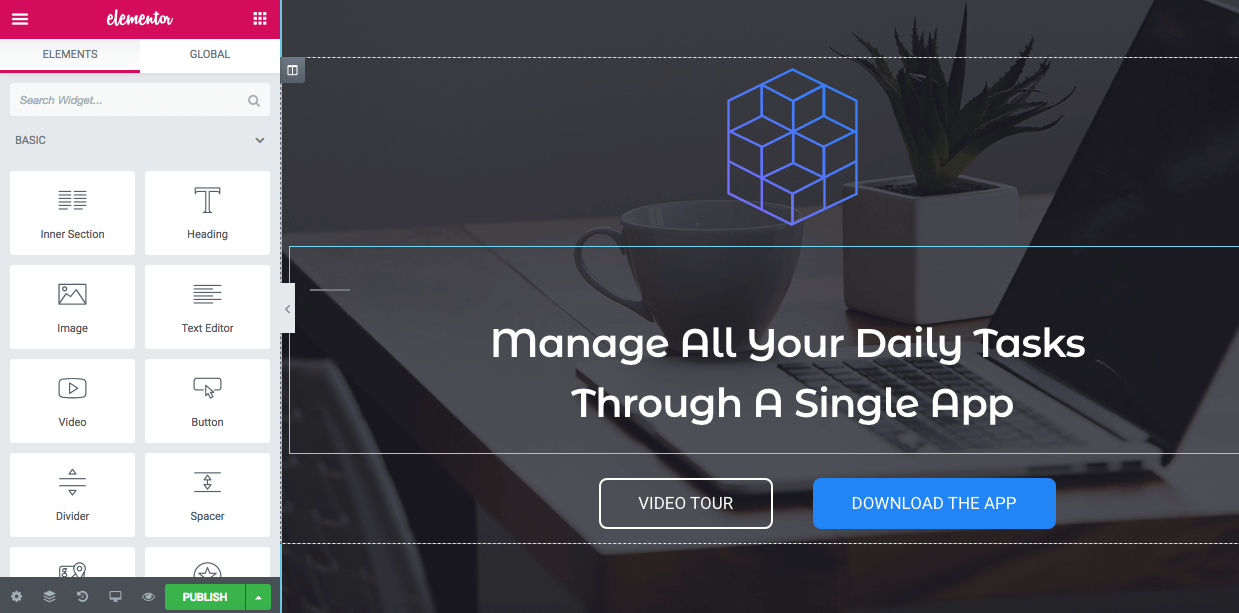
Let’s look at what it’s like to use Elementor. When you open up the page builder, you’ll see a sidebar with various widgets, and a visual preview to the right:
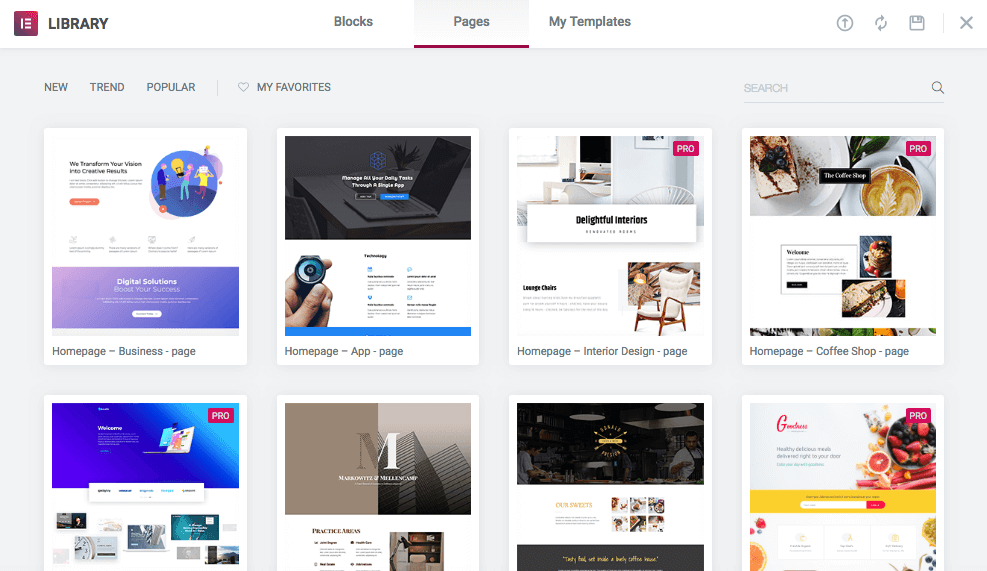
The Plus icon enables you to insert a new widget, while the folder icon will open Elementor’s blocks, pages and templates:
‘Blocks’ are pre-built components that include multiple widgets, such as a heading and text. ‘Pages’ are layouts with filler content you can replace and customize, and ‘templates’ are pages you’ve built and saved for later use.
We’ll select one of the home page layouts:
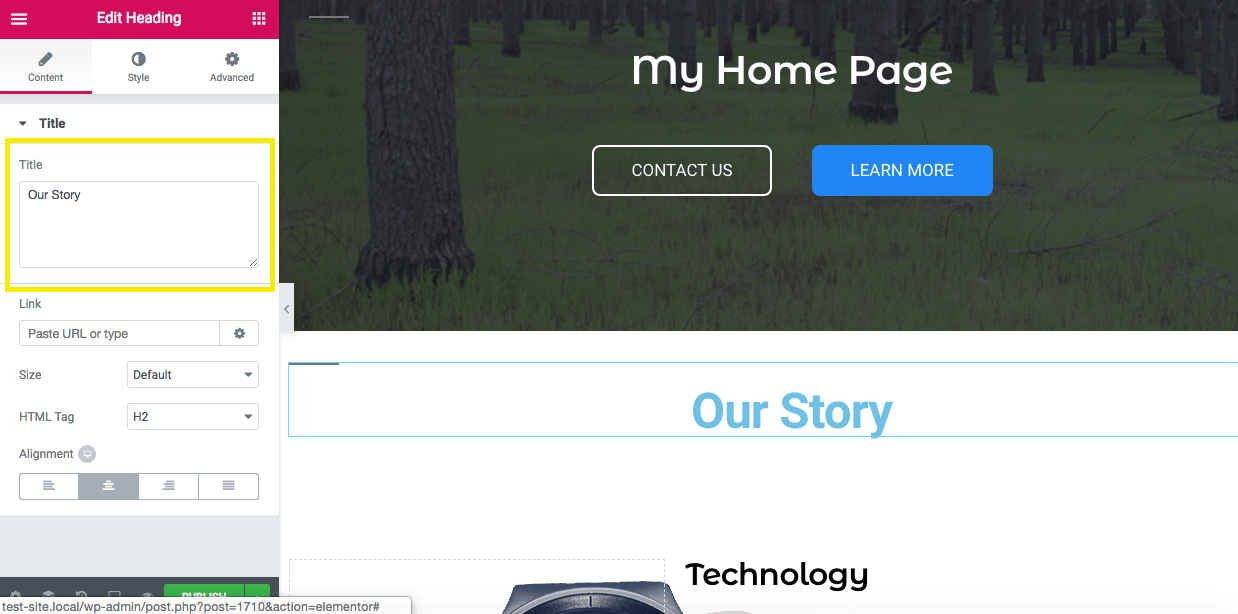
From here, you can click on each element to access its settings. You can replace text, resize buttons, change colors, and so on:
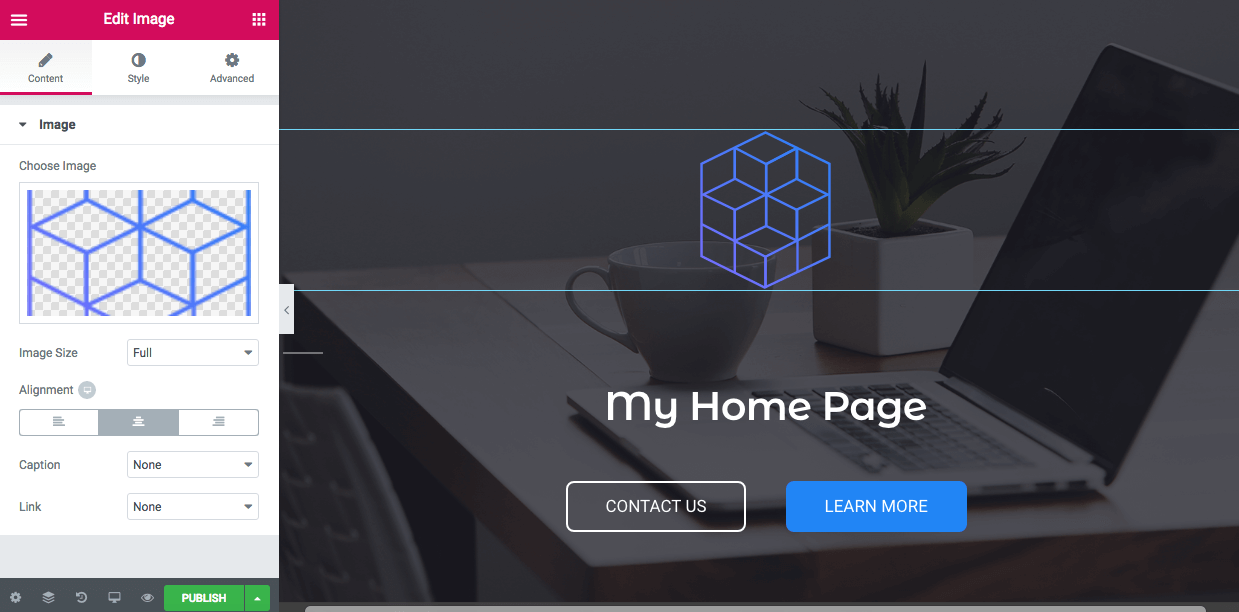
You can also insert images from your Media Library:
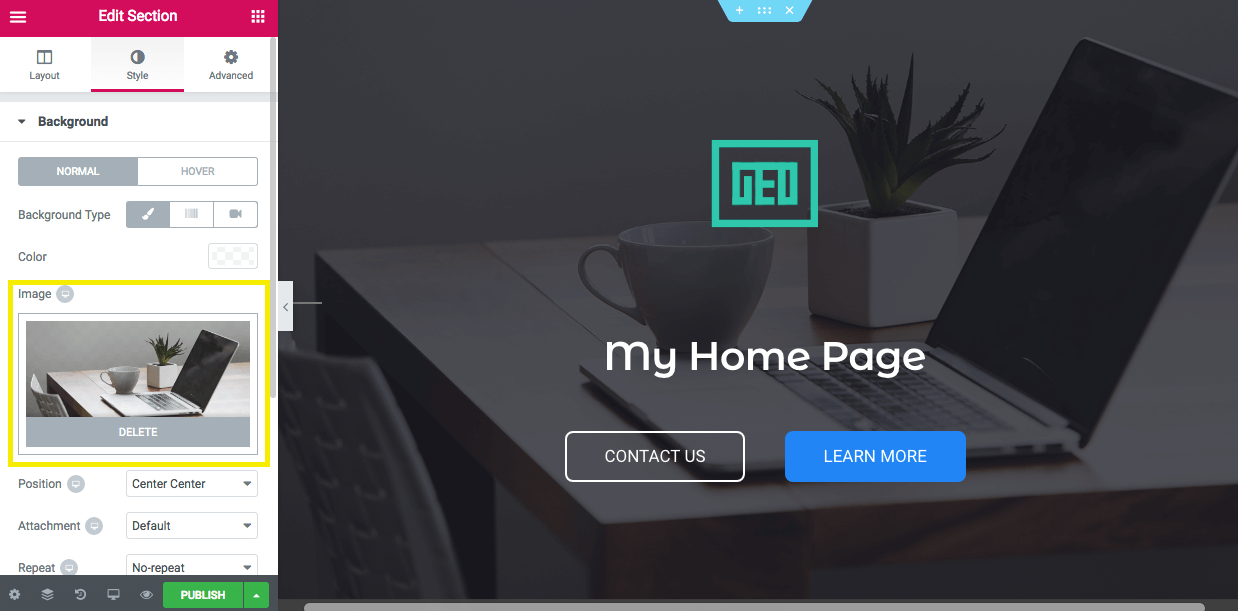
Of course, you can make tweaks to the actual layout as well. If you right-click outside of a widget, the Layout tab will open in the editor. Here, we can change our background image in the Style section:
In addition, you can add and delete sections, and modify pre-existing ones. When you finish, you can save the result as a draft or a template to use later, or publish it right from the editor.
2. Beaver Builder
The next page builder on our list, Beaver Builder, also uses a drag-and-drop system to build pages, via pre-built ‘modules’ and rows. Modules are content elements like text and images, and rows arrange modules on the page.
Like Elementor, Beaver Builder enables you to use pre-built layouts to create pages, and you can save pages you’ve built as templates. However, these features are only available in the premium version.
Beaver Builder works with most themes, although there are some incompatibilities. Unfortunately, it only enables you to modify page and post content. If you want to customize theme elements like headers and footers, you’ll need to install the Beaver Builder Theme, the Beaver Themer, or both.
If you’d like to use Beaver Builder to create sites for clients, you can access its white label option by purchasing the Agency License. On the other hand, the functionality of Beaver Builder Lite is fairly limited.
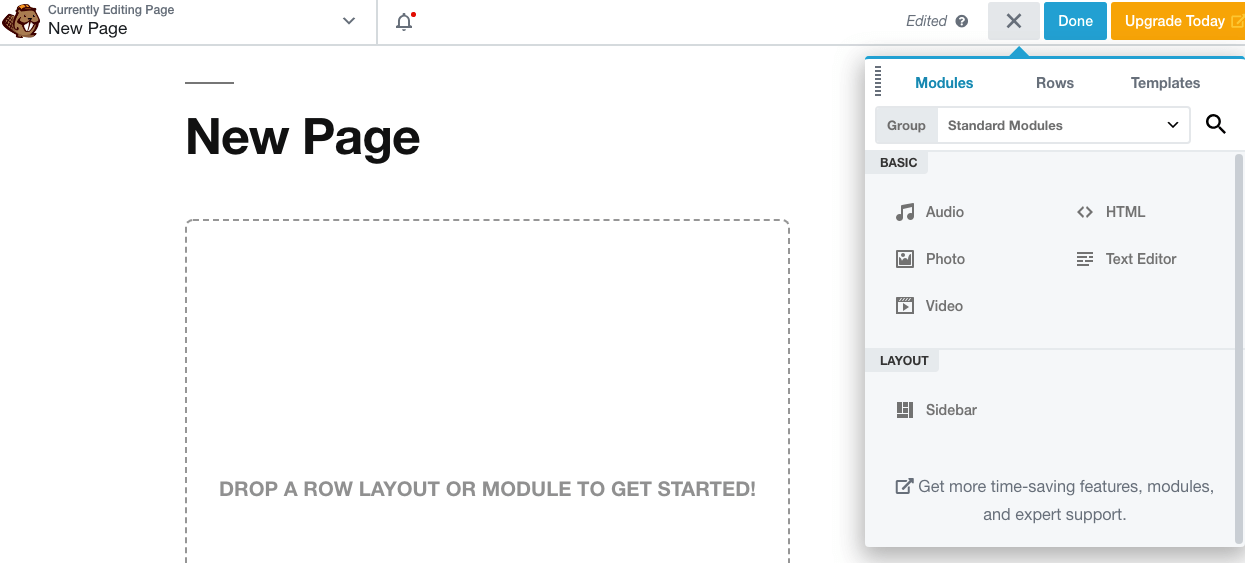
When you create a new page with Beaver Builder installed, you can access a dedicated interface:
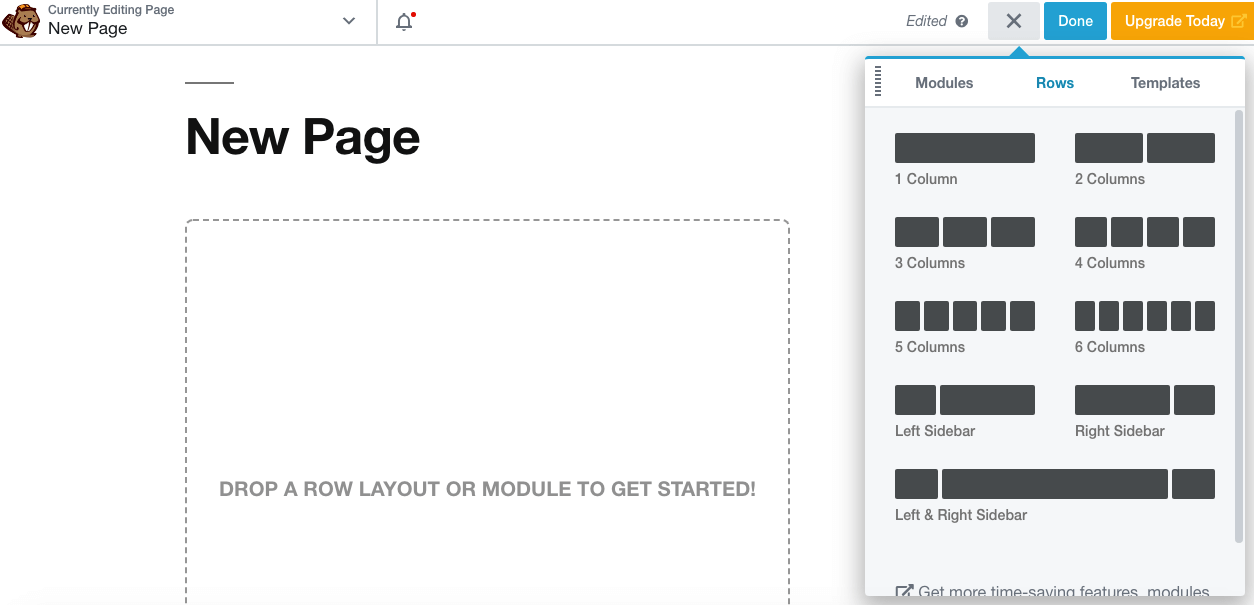
Beaver Builder uses three primary elements: modules, rows, and templates. We’ve already discussed the first two. Modules are pre-built elements, and rows determine how those modules are organized on the page, enabling you to create side-by-side content easily.
You can add a new row to your page by dragging it over from the menu:
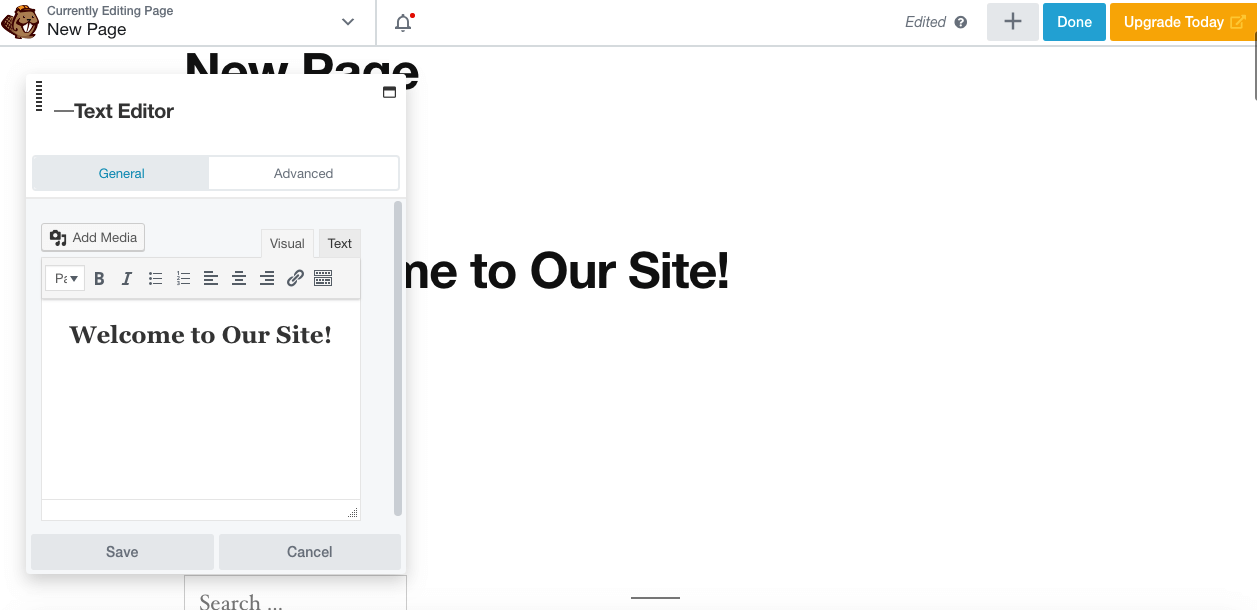
We’ll drag and drop a text module into our first row, then create a heading for the page. The text editor here may look familiar – it’s the same as the WordPress Classic Editor:
From there, you can continue adding rows and modules to build out the page. You may also embed images and other media:
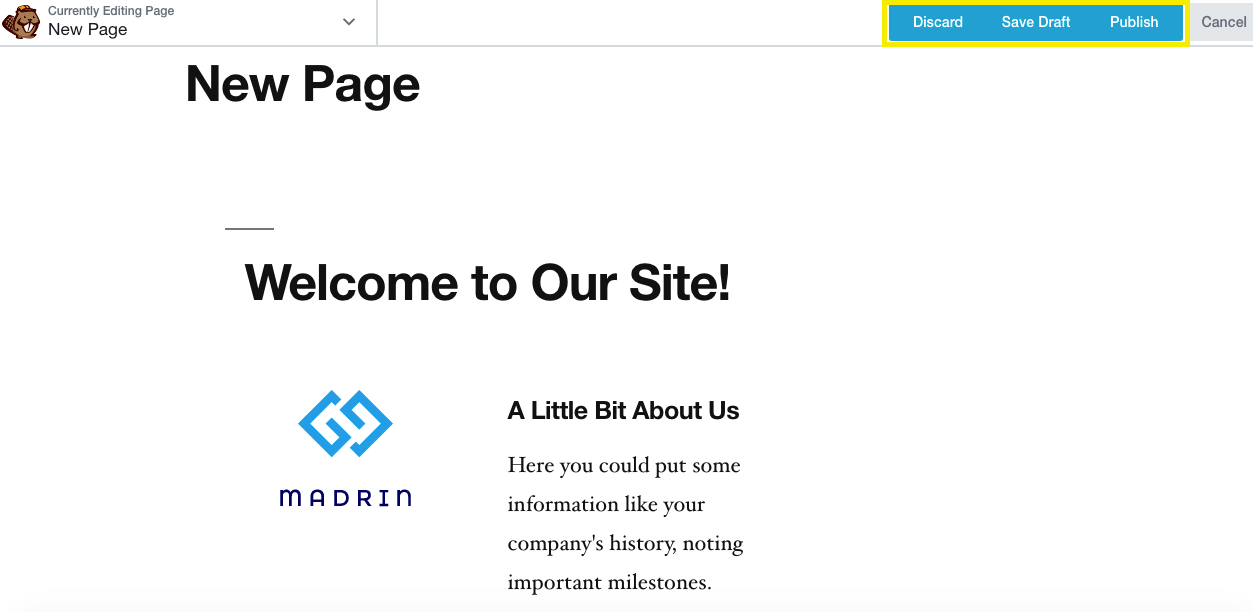
When you’re finished, you can click on Done at the top of the screen. You’ll have the chance to discard the changes you’ve made, save the page as a draft, or publish it right away:
Probably Beaver Builder’s biggest advantage is that it enables you to see exactly how your page will look when it’s published, saving you a lot of time.
3. Offsprout
Unlike Elementor and Beaver Builder, Offsprout was created specifically with design and development agencies in mind. It provides several features that reflect this focus, including a white label option right out of the box.
Offsprout uses a drag-and-drop building method with modules organized by rows and columns, not unlike Beaver Builder. It also offers free and premium page layouts, and the option to create and save templates. The premium version includes additional tools for faster site building and working with clients
Although Offsprout works with almost all themes, it has its own theme that enables you to build a site very quickly. With the Offsprout theme, you can modify headers, footers, menus, and more, and combine pre-built page layouts with client-specific content.
Just as with Elementor and Beaver Builder, you can choose to edit content normally, or switch over to the Offsprout interface:
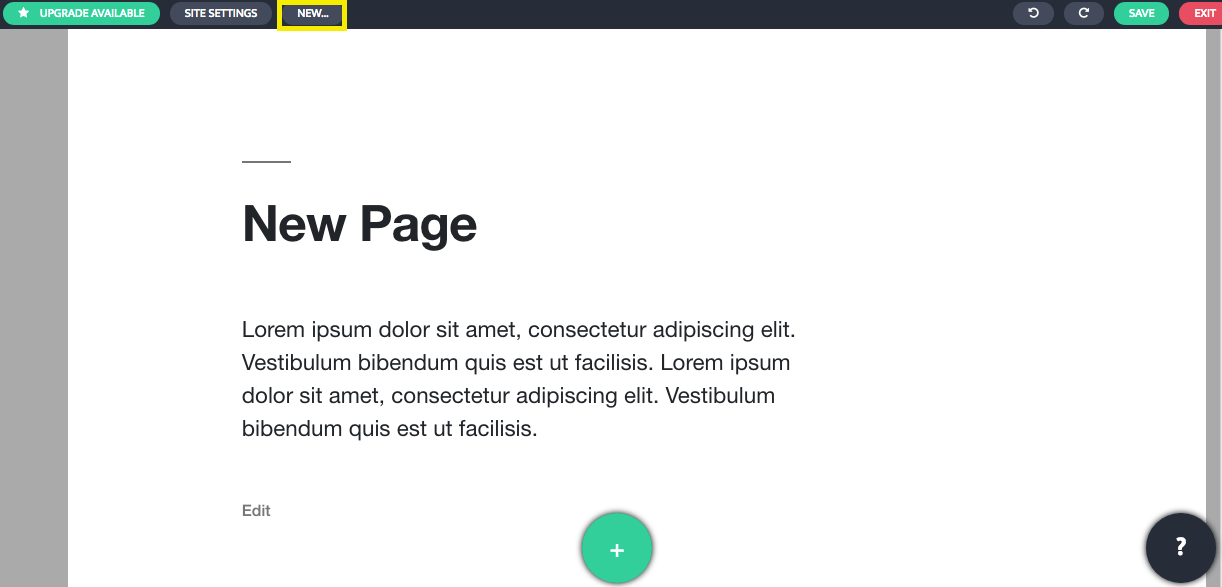
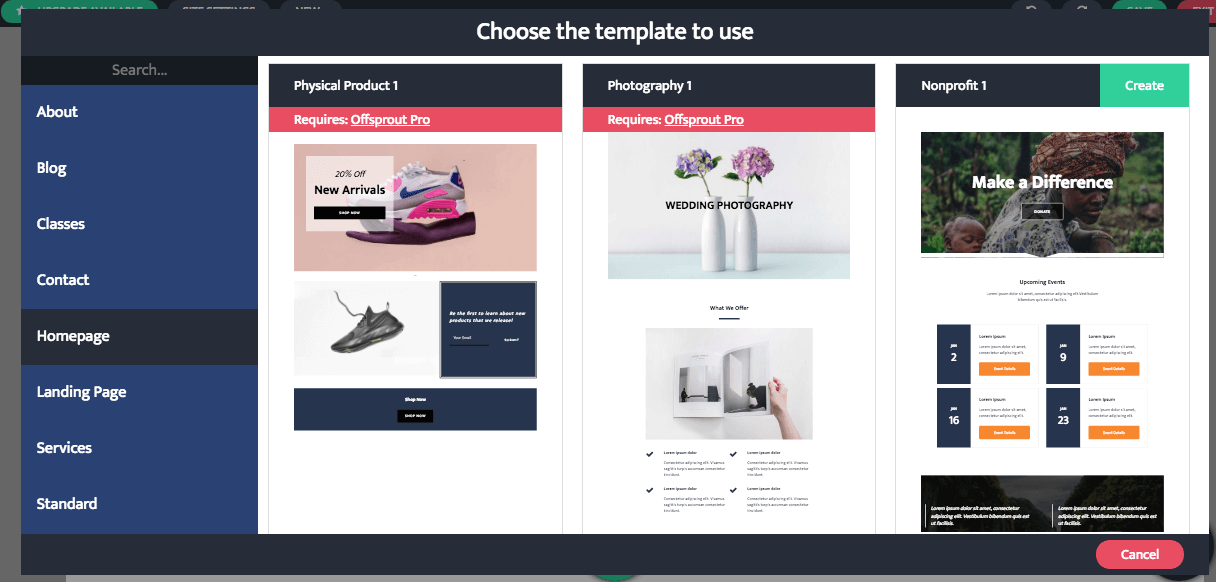
To get started quickly, you can select a page template by clicking on New, then selecting New From Template to access the library:
We’ll choose a home page for nonprofits. Once you’ve selected your template, you can start inserting your content:
Here, we’ve changed the heading by clicking on the text to delete and replace it.
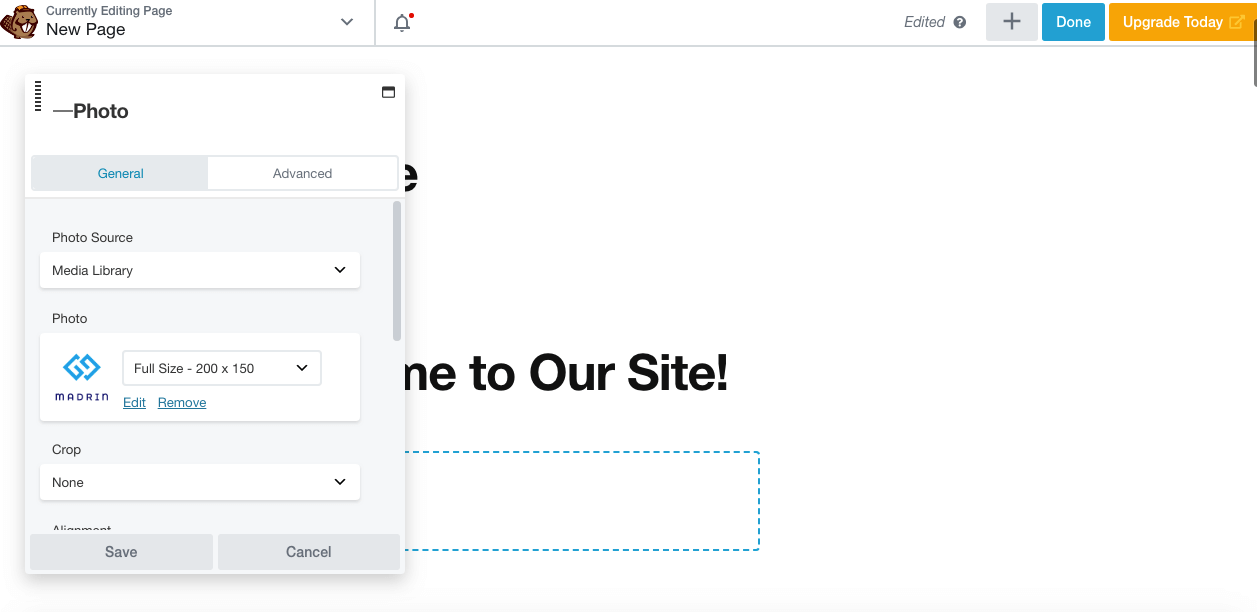
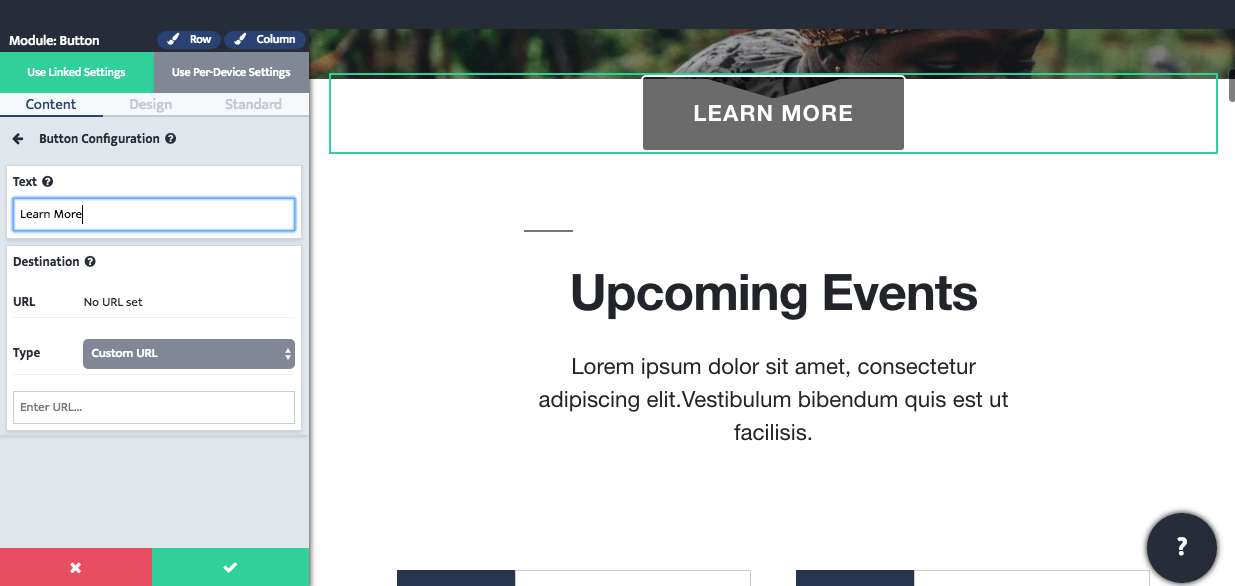
You can edit individual modules by selecting them and opening the editor, where you’ll see settings you can modify to fit your needs:
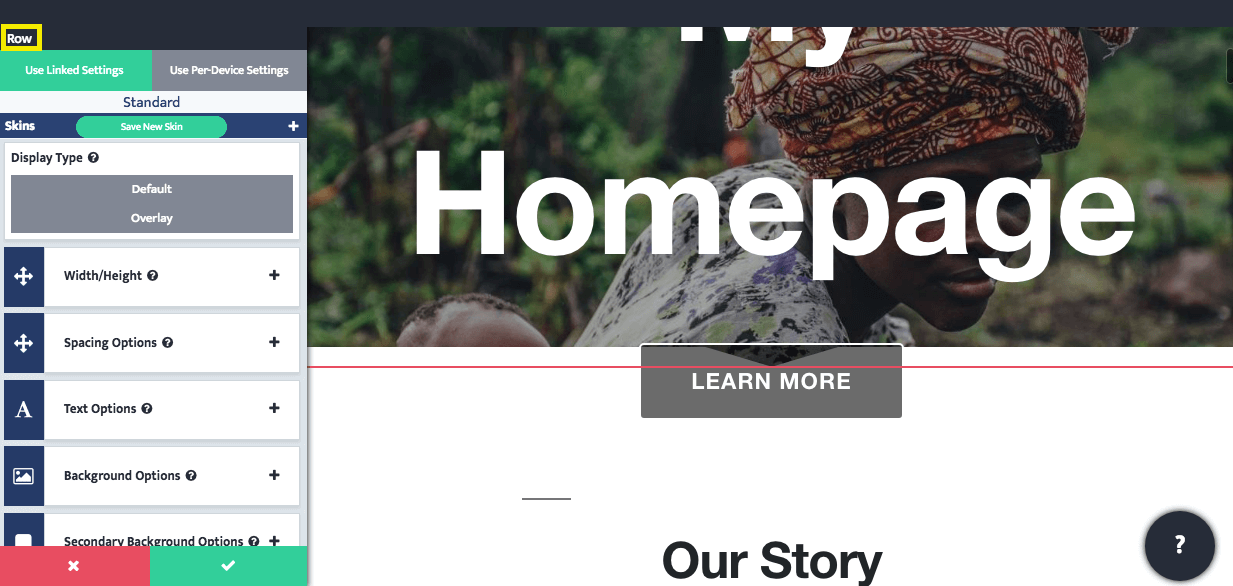
You can also edit rows and columns – the editor will indicate which element you’re working on above the options. In this case, the background image from the template is not a module but is part of the row. So to change it, we’ll have to access it in the row’s Background Options:
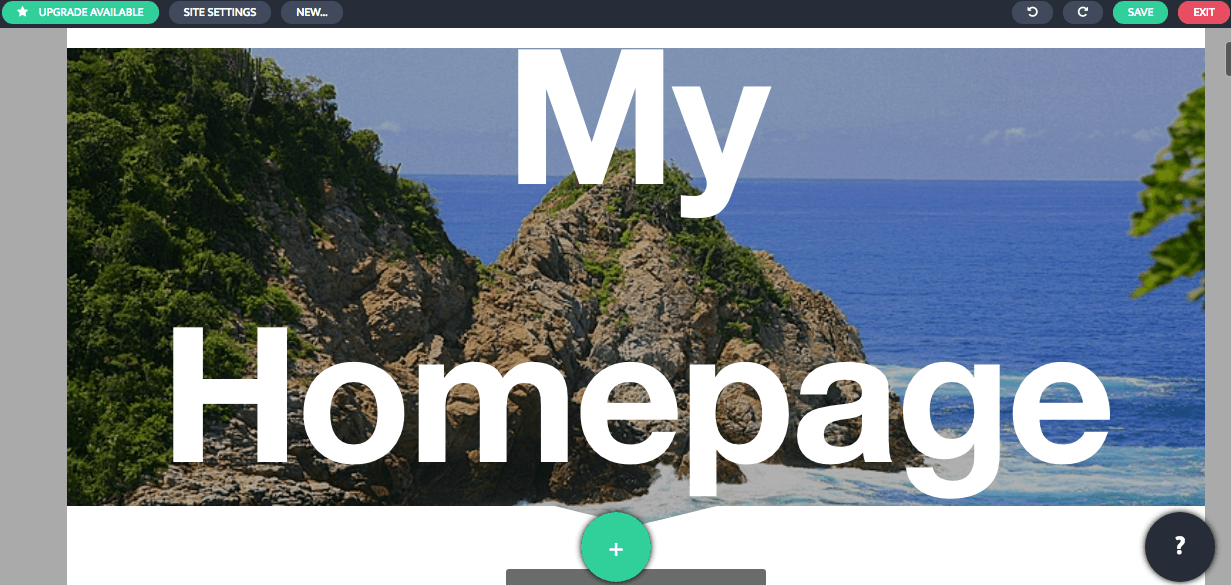
In addition to modifying the template’s content, you can add your custom content. Here’s where we’ll finally click on that big green plus button:
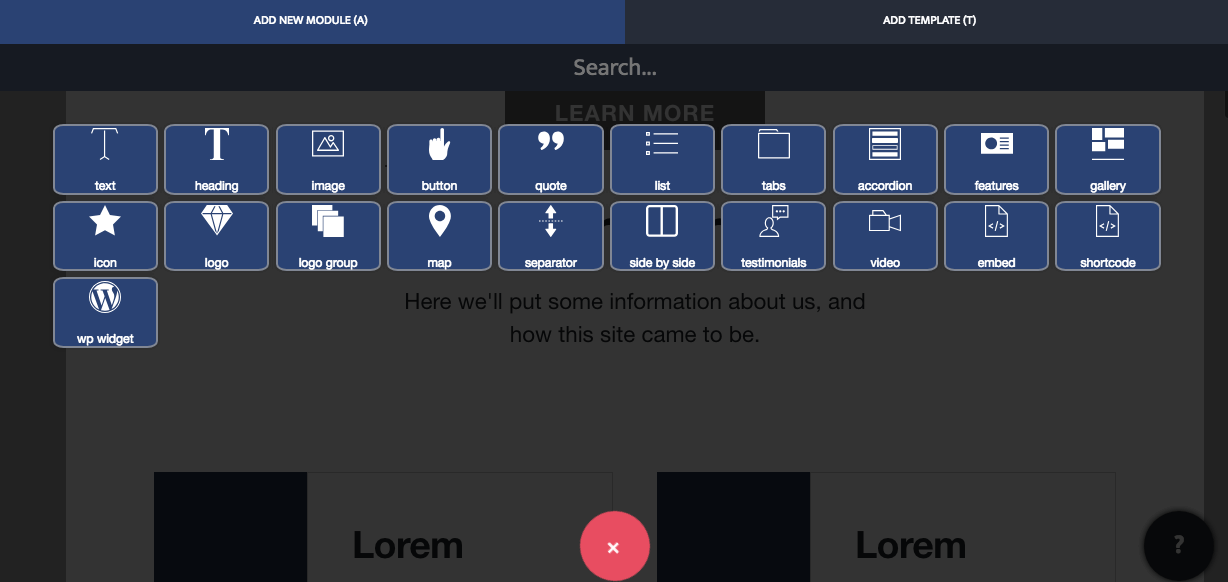
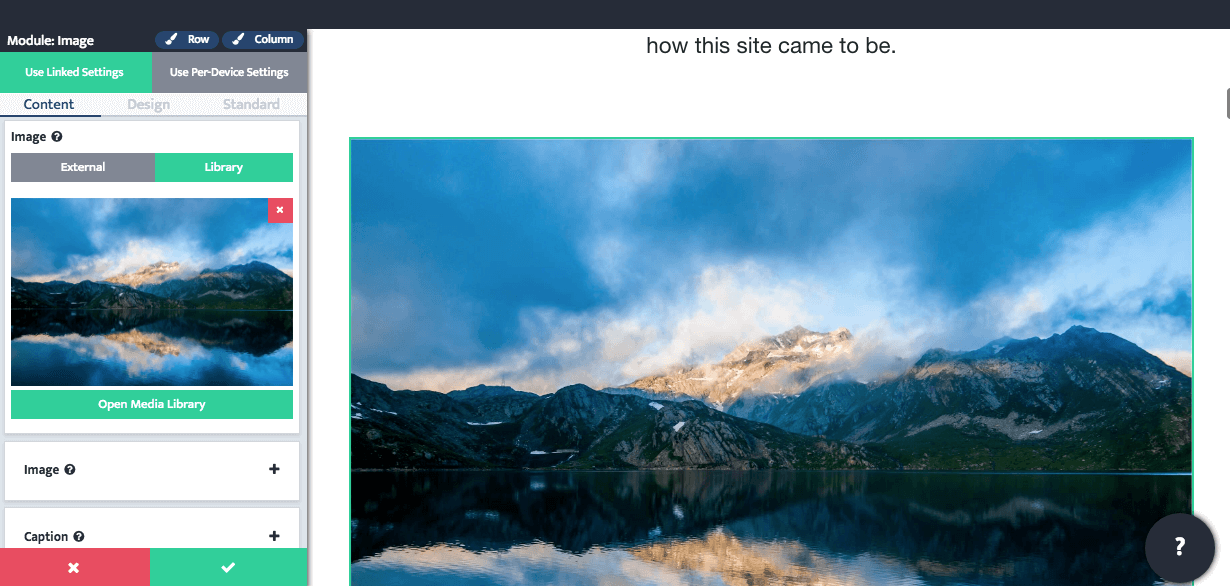
You can insert a new module by dragging and dropping it onto the page, either adding it to an existing row or column or putting it in its own section. We’ve added our own image module, and changed its settings in the module editor:
From here, you can continue editing template contents or adding new elements, until you’re happy with the results.
Conclusion
With the help of a page builder, creating a WordPress website becomes a lot faster and less intimidating. Drag-and-drop functionality, templates, and the lack of required coding make page builders an excellent tool for those with little development experience, or for experienced developers who want to build sites fast.
There are lots of WordPress page builders to choose from. Some, however – like The Divi Builder and WPBakery Page Builder – don’t make the cut in our opinion because they don’t offer a representative visual experience. Three tools worth checking out instead are:
- Elementor: A low-cost page builder with a lot of templates to choose from, and a high level of flexibility.
- Beaver Builder: A middle-of-the-road builder that can work well for all kinds of sites, and offers plenty of add-ons.
- Offsprout: A newer tool for developers, which focuses on providing key tools for those creating sites for clients.
Do you have any questions about the page builders we’ve looked at? Let us know in the comments section below!


